Probably you want to create scroll over interactive elements in WordPress, right? If so, then you’ve landed on the right page!
Nowadays, the attention span of a user is shorter than ever, and static content alone may not keep visitors engaged for long. That’s why adding interactive elements is a must for any website that wants to retain users. Among these, scroll-over elements stand out as a subtle yet powerful way to introduce depth and engagement to your WordPress site.
You might think creating these effects in WordPress is complicated, but it’s a surprisingly easy process. WordPress provides several ways to create scroll-over elements, whether through easy-to-use plugins or custom CSS for a more personalized touch.
Let’s walk through the process of creating these engaging elements. But first, let’s cover what scroll-over elements are and how they work.
Scroll Over Interactive Elements —Brief Intro
Scroll over interactive elements refer to elements within a website that react when the mouse cursor hovers over them. They add a dynamic layer to your web pages, making them more engaging and interesting for visitors.
Imagine moving your mouse cursor across a webpage. As it passes over certain elements (like images, text, or buttons), those elements react.
07 Most Common Scroll Over Interactive Elements in WordPress
Adding scroll-over interactive elements can significantly enhance the user experience on your WordPress site. Here are some of the most popular types:
- Tooltips and Hover Boxes: A small box with additional information—such as text, images, or links—appears when hovering over an element. This offers quick explanations or details without cluttering the page.
- Revealing Content on Hover: Hidden content like text, images, or icons becomes visible when a user hovers over a specific area. This adds a layer of surprise and interaction, keeping the design clean and uncluttered.
- Animated Buttons: When hovered over, buttons can change color, size, or display subtle animations like a pulse or glow. This draws attention to calls to action, encouraging users to click.
- Navigation Menu Effects: Menu items can shift color, highlight, or display a dropdown menu when hovered over, enhancing navigation with clear visual feedback and making it easier for users to locate what they need.
- Image Zoom or Magnifying Glass: Images can enlarge slightly or display a magnifying glass icon on hover, allowing users to see finer details. This effect is especially useful for product photos, intricate designs, or artwork.
- Background Color or Image Changes: The background color or image behind an element changes on hover, creating a striking effect that highlights the hovered area and brings a sense of movement to the page.
- Animated Text Effects: Text can change color, font, size, or display animations like a bounce or underline on hover, adding visual emphasis to headings, links, or key information.
These elements make your website more dynamic and user-friendly, increasing visitor engagement. You can create scroll over interactive elements in WordPress by following the steps in the next section.
Advantages of Scroll Over Interactive Elements in WordPress
Adding scroll-over interactive elements to your WordPress site can have many potential advantages:
- Clear Visual Feedback: These effects provide users with visual cues, improving navigation and making interactions intuitive.
- Modern and Polished Look: Adding subtle animations and transitions gives your website a dynamic, contemporary feel.
- Showcase Product Details: Image zoom effects allow users to examine product details more closely, which can boost interest and conversions.
- Highlight Key Content: Hover effects can spotlight critical elements like call-to-action buttons, special promotions, or featured products.
- Support for Visual Storytelling: Creatively using hover effects can help guide users through your content, enhancing your storytelling.
- Boosted Engagement: Hover effects invite users to interact with your content, creating a more engaging and enjoyable experience.
- Additional Information with Tooltips: Tooltips allow for concise explanations or extra details without overwhelming users.
- Accessible Visual Cues: Hover effects offer helpful cues for users with cognitive disabilities, making it easier for them to navigate and interact with your site.
- Less Visual Clutter: Hover-based tooltips and boxes allow you to add information without overcrowding the page, maintaining a clean design.
- Enhanced Visual Appeal: Smooth transitions and animations capture attention, making your site more attractive to visitors.
- Improved Navigation: Effects on menus and links provide visual feedback, making it clear where users are on the page.
- Enhanced Clickability: Increasing the clickable area of elements makes your site easier to use for people with motor impairments.
- Emphasis on Calls to Action: Adding emphasis to buttons or links on hover can encourage users to take actions like purchasing, subscribing, or contacting you.
The bottom line is, incorporating these interactive elements creates a more dynamic, user-friendly, and visually engaging WordPress site.
04 Ways to Create Scroll Over Interactive Elements in WordPress
You can add scroll-over interactive elements to your WordPress site in various ways, such as simple CSS tweaks and using plugins. Here’s an overview of different methods to help you find the best approach for your needs.
#1: Custom Scroll-Over Effect using CSS
CSS (Cascading Style Sheets) is a great option for adding hover effects if you’re familiar with coding.
Example: Changing Button Color on Hover
Imagine you have a “Shop Now” button and want it to change color when a user hovers over it. Here’s a simple CSS code snippet:
/* Default button style */

.shop-now-button {

    background-color: #ff9800;

    color: #fff;

    padding: 10px 20px;

    text-align: center;

    border-radius: 5px;

    transition: background-color 0.3s ease;

}

/* Hover effect */

.shop-now-button:hover {

    background-color: #e65100;

    color: #fff;

}
This code enables a smooth color transition when a user hovers over the button, making it more engaging. You can use this approach for other elements like text and images.
Adding Custom CSS in WordPress
- Go to your WordPress Dashboard.
- Select Appearance > Customize > Additional CSS.
- Paste the CSS code and publish your changes.
It’s quick and easy! Isn’t it?
#2: Create Scroll-Over Interactive Elements via WordPress Plugins
Don’t have any coding skills? No problem! WordPress plugins can make adding hover effects simple and straightforward. Here are two popular options:
a) Elementor
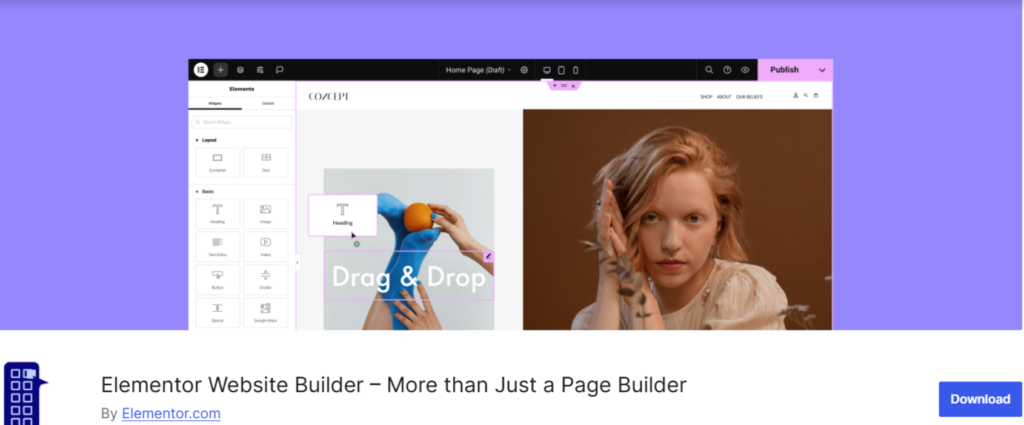
Elementor is a top-rated page builder for WordPress that comes with built-in hover effects. It’s a drag-and-drop builder, making it easy to add interactive elements without any coding.

Steps to add hover effects in Elementor:
- Open the Elementor Editor on any page.
- Select the element you want to animate, like an image or button.
- Go to the Style tab, then scroll to the Hover section.
- Here, customize hover animations, background colors, or add CSS filters for advanced effects.
- Save your changes.
b) WPBakery Page Builder
WPBakery is another popular visual editor that lets you create hover animations with ease. Similar to Elementor, WPBakery offers an intuitive interface for adding hover effects in just a few clicks.
NOTE: If after adding the CSS or installing the plugin, your site crashes or you get an error while logging in then check out our guides on the White Screen of Death in WordPress or an “error establishing a database connection.”
#3: Show Content on Hover with Gutenberg Blocks
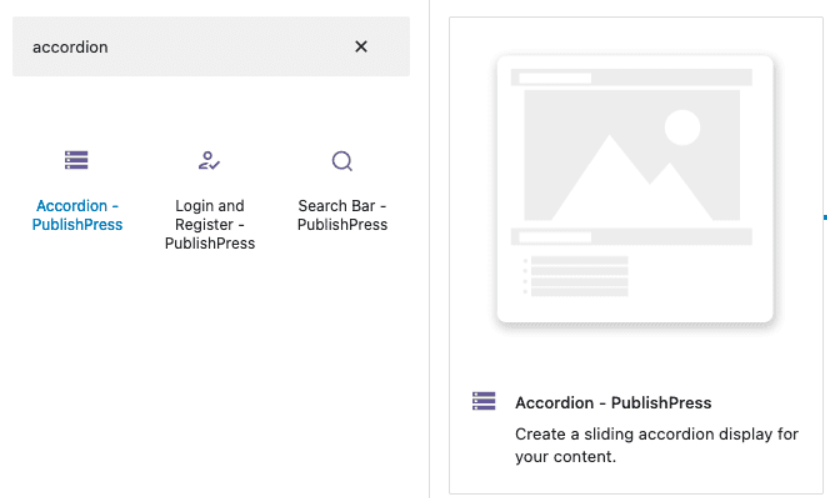
If you’re using Gutenberg, the standard WordPress block editor, the PublishPress Blocks Gutenberg Editor Plugin is a great way to add hover effects. This plugin enhances Gutenberg’s capabilities by offering interactive blocks, including one for revealing content on hover.
For example, the “Accordion block” block allows you to hide the content until a user hovers over a specific section.
Here’s how to set it up:
- Install and activate the Advanced Gutenberg Blocks plugin.
- In the block editor, add a “Accordion block” block.
- Customize the block by selecting the text or images you want to reveal on hover.
- Save your changes, and your content will now appear only when hovered over!

🤷 If you are confused about which is the best Gutenberg or Elementor then check out our guide on Gutenberg vs Elementor: Which Page Builder To Choose in 2024?
#4: Create Hover Animation via Image Hover Effects Ultimate Plugin
For unique and engaging image hover effects, the Image Hover Effects Ultimate plugin is an excellent choice. This plugin lets you create various image hover effects, including zoom-in effects, overlays, and text display on hover—perfect for portfolio sites, galleries, or product showcases.

To use the plugin:
- Install and activate the Image Hover Effects Ultimate plugin.
- Head to the plugin’s settings and select the hover effect style that suits your design.
- Use shortcodes to place these hover effects on images. Simply insert the shortcode wherever you’d like the image effect to appear.
The Pro version unlocks additional design options and advanced hover animations like “bounce” and “flip” for even more customization.
The Best Practices for Implementing Scroll-Over Interactive Elements
To achieve a seamless user experience, it’s essential to use scroll-over interactive elements thoughtfully. While these effects can enhance engagement, implementing them improperly can affect site performance or accessibility. Follow these best practices:
- Prioritize Accessibility: Make sure hover elements are accessible to all users by including focus states for keyboard navigation and screen reader compatibility.
- Optimize for Speed: Use lightweight animations and limit the number of hover effects to keep your site loading quickly and running smoothly.
- Mobile Compatibility: Since hover effects often don’t translate to touchscreens, test them on mobile devices and consider disabling certain animations for mobile users.
- Check Cross-Browser Functionality: Test hover effects across different browsers to ensure they look and perform consistently.
- Keep Animations Subtle: Choose understated animations that enhance the user experience without overwhelming the content.
To Sum It Up
If you want to enhance the user experience of the visitor of your WordPress site then you need to create scroll over interactive elements in WordPress. Whether you prefer custom CSS for tailored effects, user-friendly plugins like Elementor or WPBakery, or image-specific plugins, there are plenty of options to choose from. These interactive effects not only add visual appeal but also improve navigation and usability.
Hover effects are particularly effective for portfolio sites and online stores, creating a dynamic yet subtle user experience. And with WordPress, you don’t need coding expertise—simply pick the plugin that suits your needs and start experimenting!
Lastly, which of the above methods have you tried? Let us know in the comment section below.

![How to Create Scroll Over Interactive Elements in WordPress [Ultimate Guide] How To Create Scroll Over Interactive Elements In WordPress](https://www.wpdisc.com/wp-content/uploads/2024/11/how-to-create-scroll-over-interactive-elements-in-wordpress-1024x536.png)

![How to Have 2 Lines of Text in WordPress Header [5 Easy Ways] How to Have 2 Lines of Text in WordPress Header [5 Easy Ways]](https://www.wpdisc.com/wp-content/uploads/2025/02/how-to-have-2-lines-of-text-in-wordpress-header-1024x520.png)

![How to Clone My Website to a Second URL [9 Easy Steps] How to Clone My Website to a Second URL [9 Easy Steps]](https://www.wpdisc.com/wp-content/uploads/2025/01/how-to-clone-my-website-to-a-second-url-1024x520.png)
Leave a Reply