Are you dealing with the issue of Fluent Forms not sending email on your WordPress site? If yes, then you’re in the right place to find a solution.
When Fluent Forms fails to send email notifications, it can impact your business by causing missed leads, unanswered inquiries, and uncollected feedback from your visitors.
But don’t worry! We’ve created this guide to help you resolve the problem quickly and effectively. In this article, we’ll show you two straightforward ways to fix Fluent Forms’ email delivery issues.
Let’s dive right in and get started!
Why Does Fluent Forms Not Sending Email?
First, let’s take a look at the reasons why Fluent Forms do not send emails on your WordPress site. This issue usually happens due to two main factors:
- WordPress Default Email Functionality
- Misconfigured Fluent Forms Notification Settings
By understanding these causes, you can address the problem effectively and get your email notifications working again.
WordPress Default Email Functionality
WordPress relies on the PHP mail function to send emails by default. Unfortunately, this method often leads to undelivered emails because it lacks reliability. Many web hosting providers limit the use of PHP for sending emails to reduce spam and fraudulent activities.
Additionally, the PHP mail function does not verify the sender’s identity. This lack of authentication increases the chances of emails being blocked or flagged as spam by recipients’ email servers or filters.
Misconfigured Fluent Forms Notification Settings
Fluent Forms gives you the flexibility to set up email notifications for every form you create. You can specify the recipients, subject line, sender name, sender email, reply-to address, and the email content.
However, mistakes in these settings can lead to problems. Using an invalid email address, a sender name that doesn’t match, or a subject line that appears spammy may prevent Fluent Forms from delivering email notifications properly.
NOTE: Similar reasons also cause the not sending email issue with Formidable Forms, Divi Contact Form, Jetpack contact form, etc.
2 Easy Ways to Fix Fluent Forms Not Sending Email Issues
After reviewing the possible causes of Fluent Forms email notification failure, let’s look at two ways to resolve this issue.
Solution #1: Review Fluent Forms Email Notification Settings
By default, Fluent Forms sends email notifications to the administrator email address set in your WordPress site. If you are not receiving notifications, you need to review and adjust the email notification settings for the specific form. Follow these steps to verify and fix the issue:
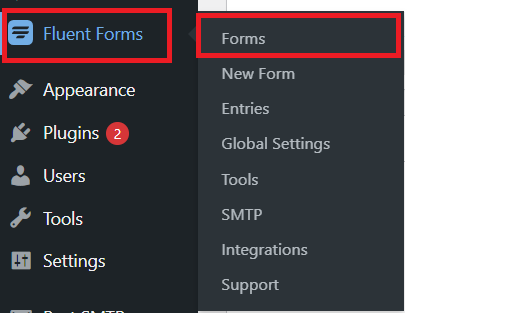
- Log in to your WordPress dashboard and navigate to Fluent Forms → All Forms.
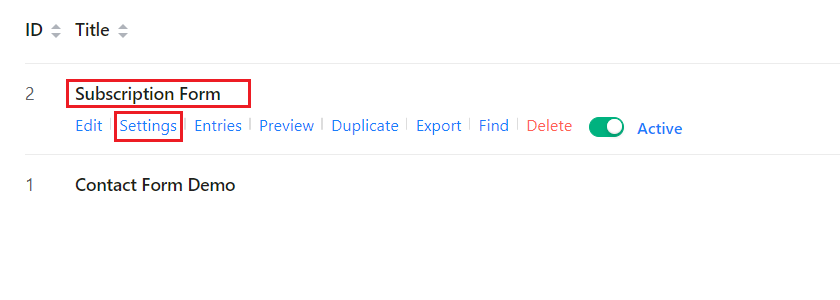
- Locate the form you want to edit and click on the Settings icon.
- Open the Email Notifications tab in the sidebar to access the default notification settings. If no notification settings exist, click Add Notification to create one.
- Make sure email notifications are Enabled.

- Click the gear icon to open the email notification settings for the form.

- In the Send To section, select the Enter Email option. Then, enter the recipient email address in the Send to Email field.

- Scroll down to the Advanced section and locate the From Email field. Input a valid email address, preferably one associated with your domain name, as it increases the chances of successful delivery.

Once you’ve updated these settings, click the Save Notifications button to save the changes.
Finally, submit a test entry to confirm that the email notifications are working. If the issue persists, proceed to the next solution.
💡If this seems complicated, check our guide on How to Create a Contact Form in WordPress [5 Easy Steps]
Solution #2: Connect an SMTP Server to your WordPress Site
Your WordPress hosting server is built to host websites, not to send emails from Fluent Forms. To improve the reliability of your Fluent Forms email notifications and prevent them from being marked as spam, you should use a dedicated email-sending service. These services are specifically designed to handle email delivery and increase the chances of reaching recipients’ inboxes.
You can connect your WordPress site to a dedicated email service by using an SMTP plugin. These plugins route your WordPress emails through optimized servers, significantly improving deliverability.
Here are some popular SMTP plugins you can consider:
- WP Mail SMTP
- Post SMTP
- Easy WP SMTP
- SMTP Mailer
These plugins are free to use, though some advanced features may require a premium upgrade. Setting up an SMTP plugin is a straightforward way to make Fluent Forms emails more reliable.
In this guide, we will demonstrate the setup process using the free version of the WP Mail SMTP plugin.
NOTE: Before we get started, backup your WordPress website. Sometimes, installing a new plugin can cause problems, so a backup allows you to quickly restore your website.
#1: Install and Configure WP Mail SMTP
To resolve the issue of Fluent Forms not sending emails, you need to replace the default WordPress wp_mail function with SMTP (Simple Mail Transfer Protocol). The WP Mail SMTP plugin makes this process straightforward. Follow these steps to install and configure WP Mail SMTP on your WordPress site:
- Log in to your WordPress dashboard with an Administrator account.
- Navigate to Plugins and click on Add New Plugin.
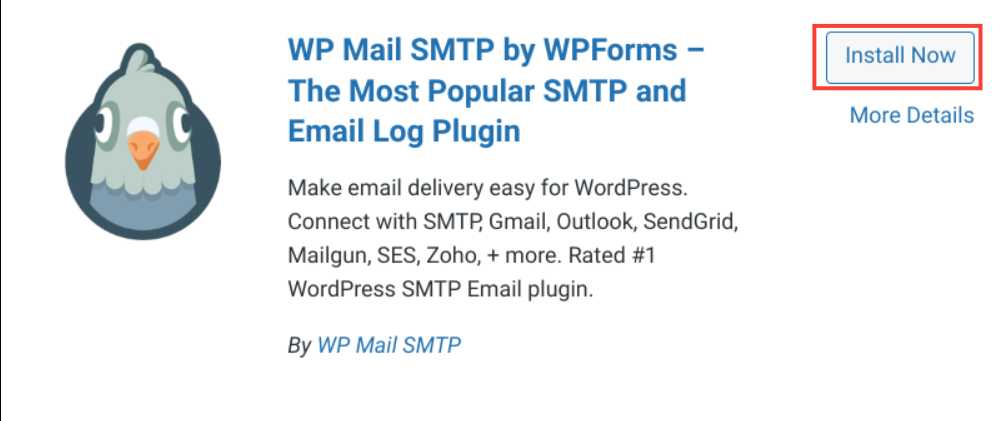
- Type WP Mail SMTP in the search bar and find the plugin created by WP Mail SMTP.
- Click Install Now and then activate the plugin.
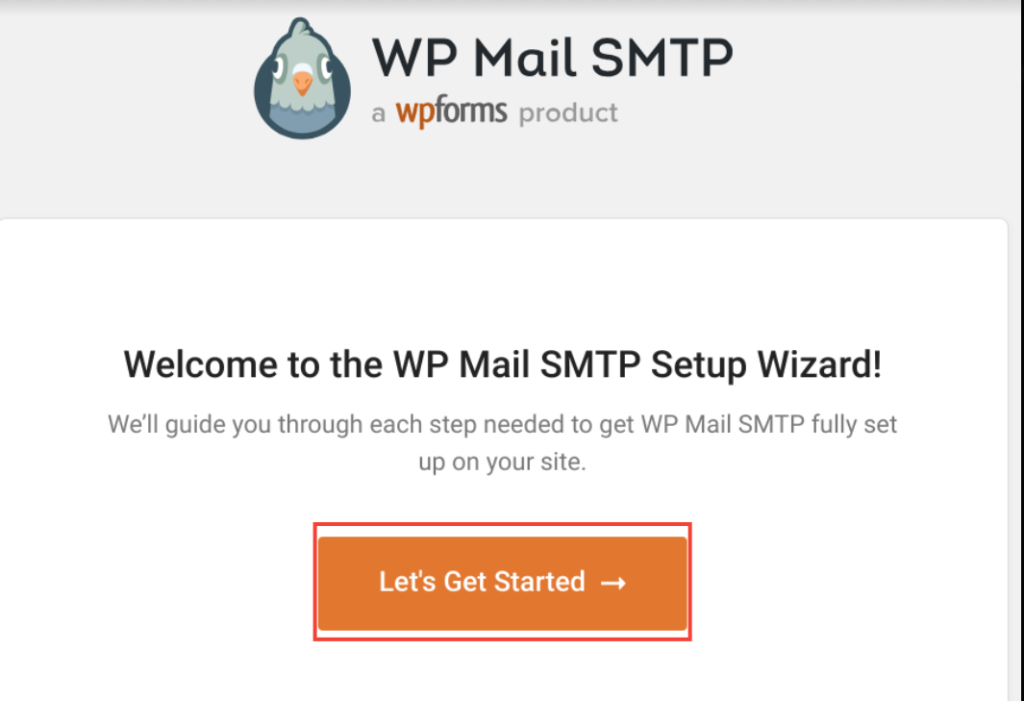
Once the plugin is activated, the setup wizard will appear:
- Click the Let’s Get Started button to begin the setup process.
- On the setup screen, select your SMTP service provider and click Save and Continue. WP Mail SMTP supports several options, such as Gmail, Sendinblue, Brevo, and Mailgun. For this guide, we will use Brevo.
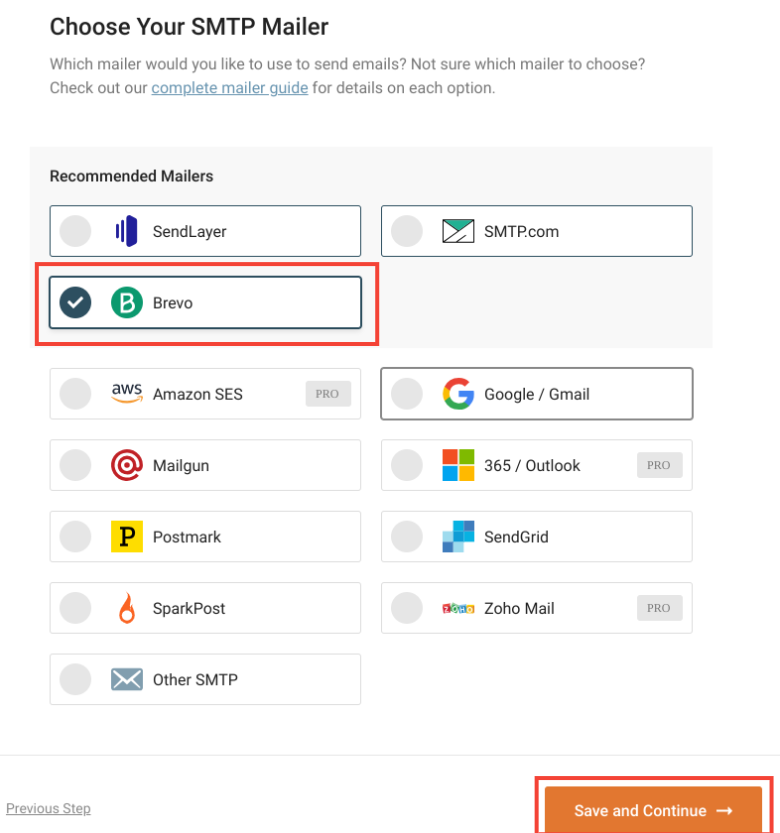
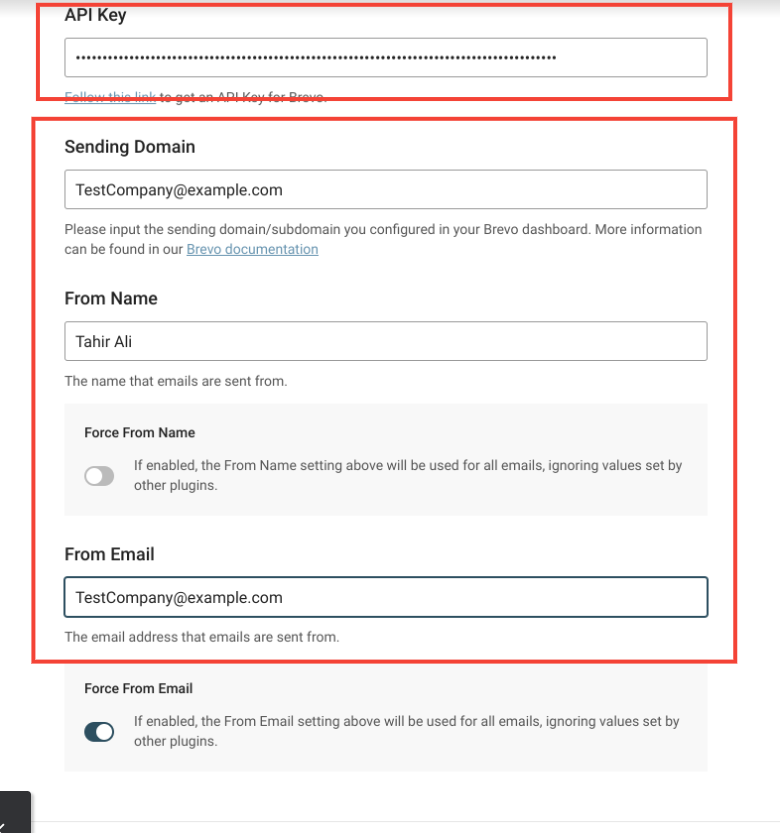
- Enter your From Email and From Name on the next screen. Use an email address associated with your domain to reduce the likelihood of emails being flagged as spam.
- Provide the required authentication details, such as an API Key or SMTP credentials. Obtain these details from your chosen SMTP service provider.
- Follow the remaining steps in the wizard and click Finish when you complete the setup.
That’s it! You have successfully installed and configured WP Mail SMTP on your WordPress site. The final step is to test the plugin to ensure it’s working correctly.
#2: Send a Test Email via WP Mail SMTP
After setting up WP Mail SMTP, you need to confirm that it’s working by sending a test email. Follow these steps to check your configuration:
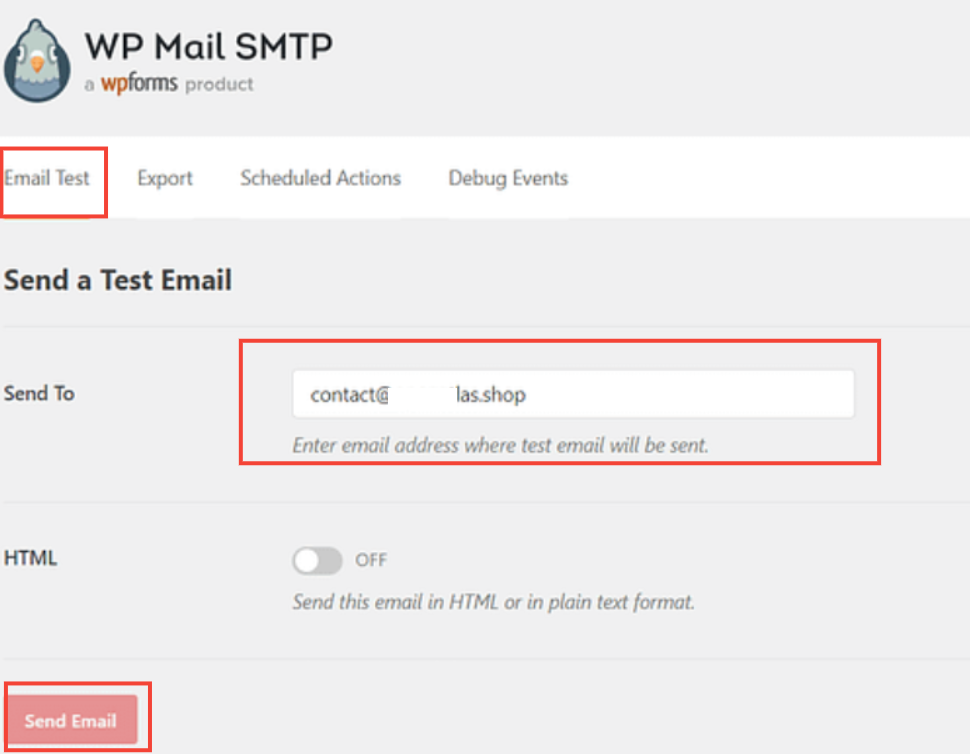
- In your WordPress dashboard, go to WP Mail SMTP → Tools → Email Test.
- Enter the email address where you want to send the test email in the Send To field.
- Click the Send Email button.
If the test email doesn’t go through and an error message appears, it could be due to incorrect authentication details, such as an invalid Client ID, or an issue with your hosting server.
However, if you receive the test email, the setup is complete. Fluent Forms will now use the configured SMTP service to deliver emails reliably, ensuring they reach your inbox.
💡You might want to read this 👉 9 Best Contact Form Plugins For WordPress [2024]
Conclusion
Email notifications play a vital role in contact form submissions, as both you and your users should receive them automatically. When Fluent Forms is not sending these email notifications, it can disrupt your business by causing missed leads, inquiries, and valuable feedback.
To fix this problem, you only need to review the email notification settings for your forms and configure a WordPress SMTP plugin by following the steps outlined above. These solutions will help you restore reliable email delivery for your Fluent Forms submissions.
If you continue to face difficulties or encounter other issues with WordPress email delivery, feel free to share your concerns in the comments section below. We’re here to help!

![How to Fix Fluent Forms Not Sending Email [2 Easy Ways] How to Fix Fluent Forms Not Sending Email](https://www.wpdisc.com/wp-content/uploads/2024/12/Fix-Fluent-Forms-Not-Sending-Email-1024x512.png)

![How to Have 2 Lines of Text in WordPress Header [5 Easy Ways] How to Have 2 Lines of Text in WordPress Header [5 Easy Ways]](https://www.wpdisc.com/wp-content/uploads/2025/02/how-to-have-2-lines-of-text-in-wordpress-header-1024x520.png)

![How to Clone My Website to a Second URL [9 Easy Steps] How to Clone My Website to a Second URL [9 Easy Steps]](https://www.wpdisc.com/wp-content/uploads/2025/01/how-to-clone-my-website-to-a-second-url-1024x520.png)
Leave a Reply